Kubernetes has revolutionized application deployment and management, but all that power can make security a bit tricky. Traditional security tools often struggle to keep pace with the dynamic nature of containerized environments.
This is where Falco comes in. Falco is a powerful cloud-native runtime security tool that leverages kernel-level insights to detect suspicious activity and potential security threats in real-time. By analyzing system calls and enriching them with container and Kubernetes metadata, Falco provides unparalleled visibility into your containerized workloads.
In this blog, we’ll walk you through how to setup Falco on your Kubernetes cluster, step-by-step. We’ll make it super easy to get real-time threat detection up and running, so you can keep your Kubernetes environment safe and sound.
Understanding the Importance of Falco on Kubernetes
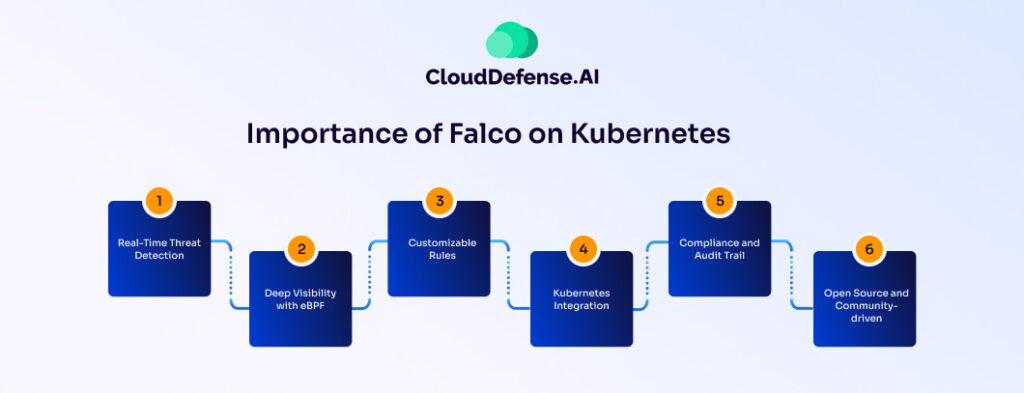
Real-Time Threat Detection: Unlike traditional tools that rely on periodic scans, Falco operates in real-time. It analyzes system calls made by your containers, acting like a vigilant guard watching every action. This allows Falco to identify suspicious activity as it happens, potentially stopping a security breach in its tracks.
Deep Visibility with eBPF: Falco leverages eBPF, a powerful technology that lets it peek directly into the kernel. This provides unparalleled visibility into what your containers are actually doing, not just what they’re configured to do. Think of it as having X-ray vision for your container security.
Customizable Rules: Falco isn’t a one-size-fits-all solution. You can define custom rules to detect specific threats relevant to your environment. This allows you to tailor your security posture to your specific needs. Imagine having a security guard who can recognize suspicious activity based on your company’s unique security protocols.
Kubernetes Integration: Falco is highly flexible with K8s. It integrates seamlessly with your existing cluster, leveraging Kubernetes API data to enrich its analysis. This means you get a holistic view of container activity within the context of your broader k8s environment. Imagine the security guard having a direct line of communication with the control center, keeping everyone on the same page.
Compliance and Audit Trail: Falco’s comprehensive logging capabilities provide a detailed audit trail of security-related events within your Kubernetes environment, helping you demonstrate compliance with regulatory requirements and internal security policies.
Open Source and Community-driven: Falco is an open-source project backed by a vibrant community of developers and security professionals, ensuring continuous innovation and support for evolving security challenges in Kubernetes environments.
Setting Up Falco on Kubernetes
This guide will walk you through deploying Falco, a powerful runtime security tool, on your Kubernetes cluster using Helm. We’ll be leveraging Falcosidekick, a companion tool that simplifies sending alerts to various destinations.
Prerequisites:
- Helm: A package manager for Kubernetes.
- Kubectl: A command-line tool for interacting with Kubernetes.
- A Kubernetes Cluster: We’ll be using K3s for this walkthrough, but the concepts apply to any Kubernetes environment.
Choosing Your Environment:
The following steps provide instructions for two environments:
- Mac with Lima: This method utilizes Lima, a containerized virtual machine manager, to run K3s.
- Windows or Linux with VirtualBox: This method leverages VirtualBox and Vagrant to create a virtual machine running Ubuntu 20.04, on which we’ll install K3s.
Whichever environment you choose, make sure you have Helm, Kubectl, and the necessary tools installed according to their respective documentation.
Creating a Kubernetes Cluster
There are two options for creating a Kubernetes cluster depending on your operating system:
Mac Users:
1. Install Lima, Helm, and Kubectl following their official guides.
2. Use the following command to create a K3s cluster.
limactl start template://k3s3. Export the Kubeconfig file as instructed by the Lima output as shown below (the path may differ on your machine).
export KUBECONFIG="$HOME/.lima/k3s/copied-from-guest/kubeconfig.yaml"4. Verify the cluster is running with
kubectl get nodes5. Then continue to install Falco using Helm
Windows & Linux Users:
- Install VirtualBox and Vagrant.
- Use the following commands to create an Ubuntu 20.04 virtual machine.
 vagrant init bento/ubuntu-20.04
vagrant up- Then, to log in, use
vagrant ssh
- Install Helm, Kubectl, and K3s inside the virtual machine’s terminal session.
- Export the Kubeconfig file as instructed by the K3s output (the path may differ).
export KUBECONFIG="$HOME/.lima/k3s/copied-from-guest/kubeconfig.yaml"kubectl get nodesInstalling Falco using Helm
Helm is the simplest and recommended way to deploy Falco and Falcosidekick (a companion tool). Here’s how to set it up:
Add the Falco Helm repository:
helm repo add falcosecurity https://falcosecurity.github.io/charts
helm repo update
Create a namespace for Falco (falco):
kubectl create namespace falcoDeploy Falco and Falcosidekick:
This command installs Falco with the eBPF probe, configures it to send alerts with a priority higher than “Notice” to a Slack channel (replace changeme with your username!), and sets a custom field “user” with your actual username.
helm install falco -n falco --set driver.kind=ebpf --set tty=true falcosecurity/falco \
--set falcosidekick.enabled=true \
--set falcosidekick.config.slack.webhookurl=$(base64 --decode <<< "aHR0cHM6Ly9ob29rcy5zbGFjay5jb20vc2VydmljZXMvVDA0QUhTRktMTTgvQjA1SzA3NkgyNlMvV2ZHRGQ5MFFDcENwNnFzNmFKNkV0dEg4") \
--set falcosidekick.config.slack.minimumpriority=notice \
--set falcosidekick.config.customfields="user:changeme"
Verify Deployment:
Wait for the Falco and Falcosidekick pods to come online:
kubectl get pods -n falco -w
You should see three pods running (falco-falcosidekick and falco).
Verify Falco pod logs:
Use this command to view Falco pod logs.
kubectl logs -l app.kubernetes.io/name=falco -n falco -c falco
This should show Falco loading successfully and details about loaded rules and event sources as given below:
Fri Jul 28 11:24:52 2023: Falco version: 0.35.1 (aarch64)
Fri Jul 28 11:24:52 2023: Falco initialized with configuration file: /etc/falco/falco.yaml
Fri Jul 28 11:24:52 2023: Loading rules from file /etc/falco/falco_rules.yaml
Fri Jul 28 11:24:52 2023: The chosen syscall buffer dimension is: 8388608 bytes (8 MBs)
Fri Jul 28 11:24:52 2023: Starting health webserver with threadiness 4, listening on port 8765
Fri Jul 28 11:24:52 2023: Loaded event sources: syscall
Fri Jul 28 11:24:52 2023: Enabled event sources: syscall
Fri Jul 28 11:24:52 2023: Opening 'syscall' source with BPF probe. BPF probe path: /root/.falco/falco-bpf.o
Simulating Suspicious Activity
Now that Falco is up and running, let’s see it in action! We’ll simulate a scenario that might raise a security red flag.
Triggering a Falco Alert:
One of Falco’s rules detects when someone runs an interactive shell inside a container. We’ll use this to test Falco’s ability to identify potentially risky activity.
Start an Alpine container:
Run the following command to create a simple Alpine container named alpine that will run indefinitely:
kubectl run alpine --image alpine -- sh -c "sleep infinity"Verify the Pod is Running:
kubectl get pods -w
You should wait for the alpine pod to come online. You should see it transition to a Running state.
Triggering a Falco Alert
Shell into the alpine container using:
kubectl exec -it alpine -- sh -c "bash"
Inside the container, run the uptime command. This will trigger a Falco alert because it’s attempting to spawn an interactive shell.
Examining Falco’s Output
Falco logs its detections by default. Here’s how to examine them:
Use the below given command to filter the Falco pod logs and show only entries with a severity level of “Notice” (the level triggered by our test).
kubectl logs -l app.kubernetes.io/name=falco -n falco -c falco | grep Notice
If everything worked as expected, you should see JSON output similar to this:
{"hostname":"falco-vdsc8","output":"22:09:57.827858816: Notice A shell was spawned in a container with an attached terminal (user=root user_loginuid=-1 k8s.ns=default k8s.pod=alpine container=d34690e67a3a shell=sh parent=runc cmdline=sh -c uptime pid=6461 terminal=34816 container_id=d34690e67a3a image=<NA> exe_flags=EXE_WRITABLE)", "priority":"Notice","rule":"Terminal shell in container","source":"syscall","tags":["T1059","container", "mitre_execution","shell"],"time":"2023-07-26T22:09:57.827858816Z", "output_fields": {"container. id":"d34690e67a3a","container.image.repository":null,"evt.arg.flags":"EXE_WRITABLE","evt.time":1690409397827858816, "k8s.ns.name":"default","k8s.pod.name":"alpine","proc.cmdline":"sh -c uptime","proc.name":"sh","proc.pid":6461, "proc.pname":"runc","proc.tty":34816,"user.loginuid":-1,"user.name":"root"}}
This detailed JSON output provides valuable information about the detected event:
- user: The user who spawned the shell (root in this case).
- k8s.pod.name: The name of the pod where the shell was spawned (alpine).
- proc.cmdline: The command used to spawn the shell (sh -c uptime).
- and more: The output contains additional details like timestamps, rule names, and tags for further analysis.
Additional Considerations:
- If you configured Falcosidekick to send Slack notifications, you can also check your Slack channel for an alert mentioning your username.
- Remember, this was a simulated scenario for demonstration purposes. In a real-world environment, you’d likely have more sophisticated rules and integrations in place for a comprehensive security posture.
Cleaning Up:
If you’re done experimenting with Falco, you can remove the resources created during this walkthrough using the following commands:
Mac:
limactl delete k3s --force
Windows and Linux:
vagrant destroy
Conclusion
We hope this guide has demonstrated how to set up Falco on your Kubernetes cluster and how to use it to detect suspicious activity within your containers. Remember, Falco is a powerful tool, and you can further customize its behavior by defining custom rules to fit your specific security needs.
Falco’s built-in rules provide a solid foundation for container security. However, to maximize its potential, consider exploring the extensive collection of curated rules offered by CloudDefense.AI’s open-source repository on [link to repository].Our meticulously crafted rules are designed to seamlessly integrate with Falco, further enhancing the security posture of your cloud-native deployments. With comprehensive coverage and a customizable approach, you can leverage Falco’s real-time alerting to an even greater extent. Proactively detect and prevent potential threats, intrusions, and suspicious activities with greater confidence.
We invite you to join our vibrant community of security professionals! Contribute to our open-source repository, share your expertise, and stay ahead of the curve in safeguarding your cloud-native infrastructure.
CloudDefense.AI offers a holistic cloud-native security solution designed to empower you. Book a free demo today and experience the enhanced security CloudDefense.AI can bring to your cloud environment.